

Malted Brown Butter Ripple Cookies
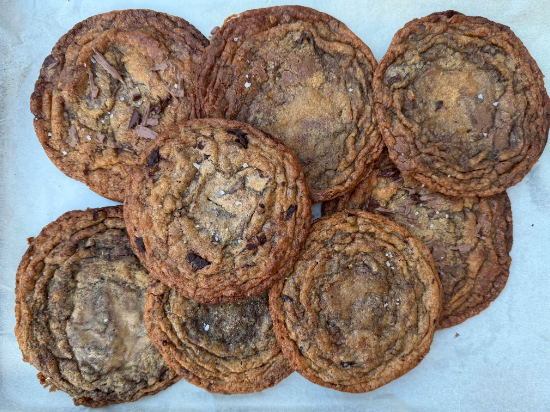
A big thank you to Sarah Kieffer, Ina Garten and Christina Marsigliese, whose recipes I tested before developing this version. I wanted the toasted butter flavour I loved in Sarah’s cookies, so I gave mine a head start with brown butter. My batch uses a little less chocolate by weight than Ina’s original batch, and there’s no pan banging - a feature I particularly loved about Christina’s recipe. I also wanted a slightly thicker centre than the three versions I tested, so I added baking powder for a little more lift, and cornflour to help achieve the texture I wanted. I think the result has worked beautifully. I hope you’ll agree.
Recipe at a glance
Yield: approximately 9 × 90 g cookies
Tray: large, light silver aluminium baking tray lined with ungreased parchment (lightly buttered foil also works, but gives more spread)
Chill: 60 mins
Oven: 190°C / 375°F conventional or 170°C / 340°F fan, centre shelf
Bake: approximately 12-14 minutes for 90 g portions; mine took 14 minutes. Begin checking at 10 minutes and use the doneness cues below. In my tests, the ripples appeared towards the end of baking, literally in the last 1-2 mins so do not be alarmed if they look puffy and weird when you check on them!
Allergens: wheat (gluten), milk and egg; barley (gluten) when using Horlicks; soya depending on the chocolate. Check the labels of your chosen ingredients.
These are thin (but not too thin), chewy malted chocolate chip cookies with crunchy, browned, rippled edges and a softer centre. The ingredient brands, equipment and method below reflect my kitchen tests; your result may vary.
Equipment
Digital kitchen scales; jewellery scales or spoon measures (I used spoons); large mixing bowl; medium bowl; small bowl; rubber spatula; large light silver aluminium baking tray; parchment paper or foil and a little butter for greasing; balloon whisk; spoon or cookie scoop; cling film; cooling rack.
An oven thermometer is strongly recommended. A stand mixer or electric whisk can be used instead, but mixing times and results may differ.
Ingredients & baker’s percentages
I’ve listed the brands I used so you can get as close as possible to the ingredients in my test batch. If you can’t find them, use the closest equivalents available. Results may vary as flour protein content, the size and style of your chopped chocolate, butter temperature, baking tray and oven temperature can all affect how much the cookies spread, brown and ripple. I recommend baking one test cookie first so you can adjust the timing for your oven.
All ingredients were at 21–22°C when mixed. Spoon measures are approximate; the gram quantities are the reference weights. Vanilla is measured as 5 ml, with its gram weight estimated for the percentage calculation.
Total wheat flour is 165 g: 140 g plain flour (85%) and 25 g bread flour (15%) — approximately an 85:15 split. Baker’s percentages below use that combined wheat flour as 100%. Cornflour is listed separately. Total sugar is 250 g, split equally: 125 g brown and 125 g white.
Ingredients
| Ingredient | Weight | Baker's % |
|---|---|---|
| Plain flour (Asda, 10% protein) | 140 g | 85% |
| Bread flour (Allinson's, 12% protein) | 25 g | 15% |
| Cornflour (Asda) | 10 g | 6% |
| Malted milk powder (Horlicks) — optional | 10 g | 6% |
| Bicarbonate of soda (Borwicks) | 2.5 g (½ tsp) | 1.5% |
| Baking powder (Borwicks) | 5 g (1 tsp) | 3% |
| Fine salt (Kirkland/Costco) | 4 g (⅔ tsp) | 2.4% |
| Light brown sugar (Asda) | 125 g | 76% |
| Granulated sugar (Tate & Lyle) | 125 g | 76% |
| Softened brown butter, prepared as below (or softened unsalted butter) (Asda) | 135 g | 82% |
| Egg, without shell (about 1 large) | 54 g | 33% |
| Vanilla extract (Nielsen-Massey) | 5 ml (≈5 g) | ≈3% |
| Water | 12 ml (12 g) | 7% |
| Milk chocolate (Asda), finely chopped; reserve a few shards | 55 g | 33.3% |
| Dark chocolate (Asda), finely chopped; reserve a few shards | 55 g | 33.3% |
| Blonde chocolate (Caramilk), finely chopped; reserve a few shards | 55 g | 33.3% |
| Flaky salt (Maldon), to finish | To taste | — |
Baker's percentages are calculated using the combined weight of plain and bread flour (165 g = 100%). Measurements in grams are recommended for accuracy.
Before you start: butter and mise en place
1. Brown your butter, if using, making sure to add back the lost liquid with milk.
For reference, I browned 250 g unsalted butter and had 233 g remaining. I added 17 ml semi-skimmed milk to bring the batch back to its starting weight of 250 g. This had been kept in my fridge and taken out an hour before needing, and allowed to soften, then I weighed out what was needed for this recipe.
If you have not browned butter before I would recommend trying this recipe with softened regular butter first. As mentioned, the butter was a little past soft but not melted or pourable - you should be able to press a dent into it with your finger easily. Its temperature was 21.5°C.
2. Mise en Place (prepare ingredients).
Ensure the dough ingredients are at room temperature. My home is 21-22°C so this was the temp of all my ingredients. If yours is cooler or substantially warmer, results may vary. You may wish to use a probe thermometer, though if all your ingredients have been at room temp, this may suffice.
Weigh all ingredients and finely chop all three chocolates (if the chunks are too big it might interrupt the spread of your cookies - see photos). If your home is particularly warm, keep your chocolate in the fridge until you’re ready to use it.
3. Prepare your dry and wet ingredients.
Whisk the plain flour, bread flour, cornflour, malt powder, bicarbonate of soda, baking powder and fine salt together in the medium bowl. Whisk the egg, water and vanilla together in the small bowl. Keep the sugars and butter ready beside the large bowl.
Method
1. Beat the butter and sugars
Put the 135 g softened butter (regular butter is pictured but you may be using browned), 125 g light brown sugar and 125 g granulated sugar in the large bowl.
Using a rubber spatula, smear the sugar and butter together until semi mixed, then stir quite vigorously for about 1-2 minutes, until lighter in colour and texture, see below. Scrape down the sides of the bowl with a rubber spatula.
2. Add the egg mixture
Pour in the egg, water and vanilla mixture. Mix for about 1 minute, until it looks smooth, uniform and fully incorporated. Scrape down the bowl again.
3. Add dry ingredients, then chocolate
Add the dry ingredients. Fold gently with a rubber spatula until a few flour streaks remain. Add chopped chocolate and fold a few more times, just until no flour streaks remain. Do not keep mixing once combined.
4. Chill the dough
Cover with cling film and refrigerate for at least 60 minutes.
If you plan a longer chill or intend to freeze the unbaked dough, portion and shape it before chilling, a fully chilled bowl of dough will be too firm to shape easily.
I have not tested this recipe after chilling it for more than 60 minutes or baking the dough from frozen, so either may affect the final result - do let me know if you try it!
5. Prepare the oven and tray
Near the end of the chill (20–30 minutes before), preheat oven to 190°C / 375°F conventional (170°C / 340°F fan).
I would strongly suggest checking with an oven thermometer if you have one. Line the light silver aluminium tray with parchment paper.
6. Portion and shape
Using a cookie scoop or spoon, measure out 90 g dough for each cookie. Using your hands, roll it a little between your palms until it is a touch taller than it is wide.
This is the shape I used to help retain a little more thickness. Top with a few shards of the leftover chocolate, if desired.
Avoid rolling it into a perfectly smooth ball; aim for the slightly uneven surface shown in the photo.
(Pictured: scooped dough on the left; dough shaped with a spoon on the right.)
7. Space and bake
Place the shaped dough well apart on the tray. The cookies spread a lot, so expect to fit only 2-3 per batch, depending on tray size. I left about 3 inches between each of mine and my large baking tray fits 3 on.
Bake on the centre shelf of the oven. Begin checking cookies at 10 minutes; allow roughly 12–14 minutes, using the appearance as your guide. They took 14 minutes in my oven.
The ripples may appear towards the end of baking, so don’t worry if they still look smooth when you first check.
When done, the edges should look rippled and browned (see photos below), while the centre is still slightly puffed and looks a little underdone. It will continue to cook a little on the hot tray.
Remove from the oven. You can give them one sharp tap on the counter if you want, to deflate the middle a little. If they’re a little misshapen use a bowl or the outside of a small springform cake tin to swirl them gently back into a circle.
8. Salt and cool
Sprinkle the cookies with flaky sea salt as soon as they leave the oven, unless you’re particularly salt averse!
Let them cool completely on the tray before transferring to a cooling rack.
Storage
If you can resist eating them all over the sink like an animal (no I am NOT talking about myself), store baked cookies airtight for up to 3 days.
Baked cookies can also be frozen for up to 3 months: wrap them well and separate layers with parchment paper.
A note from me
This recipe has only been tested in my kitchen. Although I have included all the details I can, results may vary with your ingredients, equipment and oven.
Please feel free to reach out to me on socials and let me know how you got on with the recipe :)
Please also note that all Amazon links are affiliate links.
Happy baking angel xxx
Recipe comparison: baker’s percentages
Baker’s percentage = ingredient weight ÷ flour weight × 100.
Flour is always 100%, so the figures compare proportions even when the batches differ in size. Each cell below shows grams followed by the baker’s percentage. Values are rounded to one decimal place.
The three reference columns use the authors’ published original recipes, rather than any altered test batches. Ina’s cup measures are estimated using 120 g flour, 200 g granulated sugar and 220 g packed brown sugar per US cup. Egg weights are estimated at 50 g for a US large egg and 56 g for extra large; mine was weighed at 54 g. Teaspoon-only soda and salt quantities are approximate (salt varies by type).
Vanilla is approximately converted at 1 g/ml for this comparison; water is 1 g/ml. The vanilla weights and percentages are approximate. Finishing salt is excluded.
Reference recipes:
Sarah Kieffer: Pan-Banging Chocolate Chip Cookies
Ina Garten: Giant Crinkled Chocolate Chip Cookies
Christina Marsigliese: Caramelized Ripple Chocolate Chip Cookies
Note: my final batch contains less chocolate in absolute grams than Ina’s batch, but slightly more chocolate relative to flour. Brown butter here means my prepared brown butter with the lost weight restored using milk; it is not pure butterfat. The extra water is listed separately.
| Ingredient | Sarah Kieffer | Ina Garten | Christina Marsigliese | Brown Butter Bakes |
|---|---|---|---|---|
| Flour | 284 g / 100% | ≈240 g / 100% | 150 g / 100% | 165 g / 100% (140 g plain + 25 g bread) |
| Butter | 227 g / 79.9% | 227 g / 94.6% | 113 g / 75.3% | 135 g / 81.8% |
| Granulated sugar | 297 g / 104.6% | ≈300 g / 125% | 100 g / 66.7% | 125 g / 75.8% |
| Brown sugar | 50 g / 17.6% | ≈55 g / 22.9% | 110 g / 73.3% | 125 g / 75.8% |
| Total sugar | 347 g / 122.2% | ≈355 g / 147.9% | 210 g / 140% | 250 g / 151.5% |
| Egg, no shell | ≈50 g / 17.6% | ≈56 g / 23.3% | ≈50 g / 33.3% | 54 g / 32.7% |
| Added water | 30 g / 10.6% | 30 g / 12.5% | 0 g / 0% | 12 g / 7.3% |
| Cornflour | — | — | — | 10 g / 6.1% |
| Malt powder | — | — | — | 10 g / 6.1% |
| Bicarbonate of soda | ≈2.3 g / 0.8% | ≈2.3 g / 1% | ≈2.3 g / 1.5% | 2.5 g / 1.5% |
| Baking powder | 0 g / 0% | 0 g / 0% | 0 g / 0% | 5 g / 3% |
| Salt in dough | ≈4.5 g / 1.6% | ≈3 g / 1.3% | ≈3 g / 2% | 4 g / 2.4% |
| Vanilla (approx.) | ≈7.5 g / 2.6% | ≈7.5 g / 3.1% | ≈5 g / 3.3% | ≈5 g / ≈3% |
| Total chocolate | 170 g / 59.9% | 227 g / 94.6% | 170 g / 113.3% | 180 g / 109% |
| Chocolate choice | Bittersweet | Bittersweet | Dark / chopped bar | Blonde, milk & dark chopped |
| Pan banging? | Yes | Yes | No | No |
Notes & potential troubleshooting
These notes reflect my own kitchen tests. Where I suggest an adjustment, it is a (reasonably!) educated starting point for a new test, not a guaranteed fix!
Ingredient substitutions
Please feel free to omit the malted milk powder if you do not enjoy the taste. I include it for flavour; the cookies also work without it, although I cannot promise an identical texture or spread.
I have also tested this with 100% plain flour and it worked well. If that is all you have, use 165 g plain flour in place of the plain/bread flour blend, keeping the 10 g cornflour separate.
Baking surface
I’ve tested these on ungreased parchment and lightly greased foil. Both worked in my kitchen, but the greased foil gave a little more spread and a thinner cookie. Use the same tray and lining when comparing batches.
Longer chilling and freezing
I haven’t tested this final recipe after an overnight chill or baked the dough from frozen, so I cannot give a tested method or timing for either.
If you try it, please let me know your chilling/freezing time, dough temperature when baked, oven setting, bake time and result.
Baking outside the UK
I developed this recipe using UK ingredients. Results may differ elsewhere because products sold under the same ingredient names can have different properties.
Use the closest equivalents you can find, and compare flour protein content and butter fat content where available; matching a label does not guarantee an identical result.
Possible flour and water adjustments (not tested fixes!)
If your cookies spread more than you want, you could try increasing the plain flour by about one level teaspoon per full batch, or reducing the added water.
If they barely spread, you could try reducing the plain flour by about one level teaspoon.
Omitting the added water entirely is another experiment, but a bigger change than simply reducing it.
These are educated guesses, not rules. They could affect thickness, texture and ripples, and the cause may instead be your dough temperature, tray or oven.
Change only one thing at a time, weigh and record the adjustment, and bake a test cookie.
Notes
Use the stated 90 g portions or close to that, and keep shaping, chilling, tray, oven setting and shelf position consistent when testing an ingredient change. Compare the cookies once fully cooled.
During development, reducing the total sugar by 10% caused my cookies to lose their ripples; I would not treat sugar reduction as a reliable fix for excess spread, though of course you are welcome to experiment!
Please be my recipe testers! Send me a photo and tell me what ingredients and equipment you used, how you chilled and baked the dough, and what you changed. The more detail you share, the easier it will be to see where our batches differ.
😀
Malted Brown Butter Rippled Chocolate Chip Cookies
Free recipe download
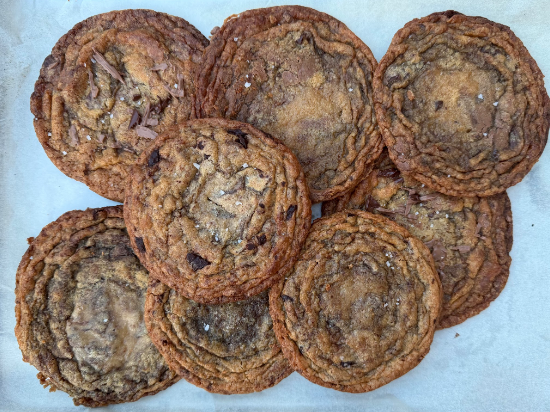
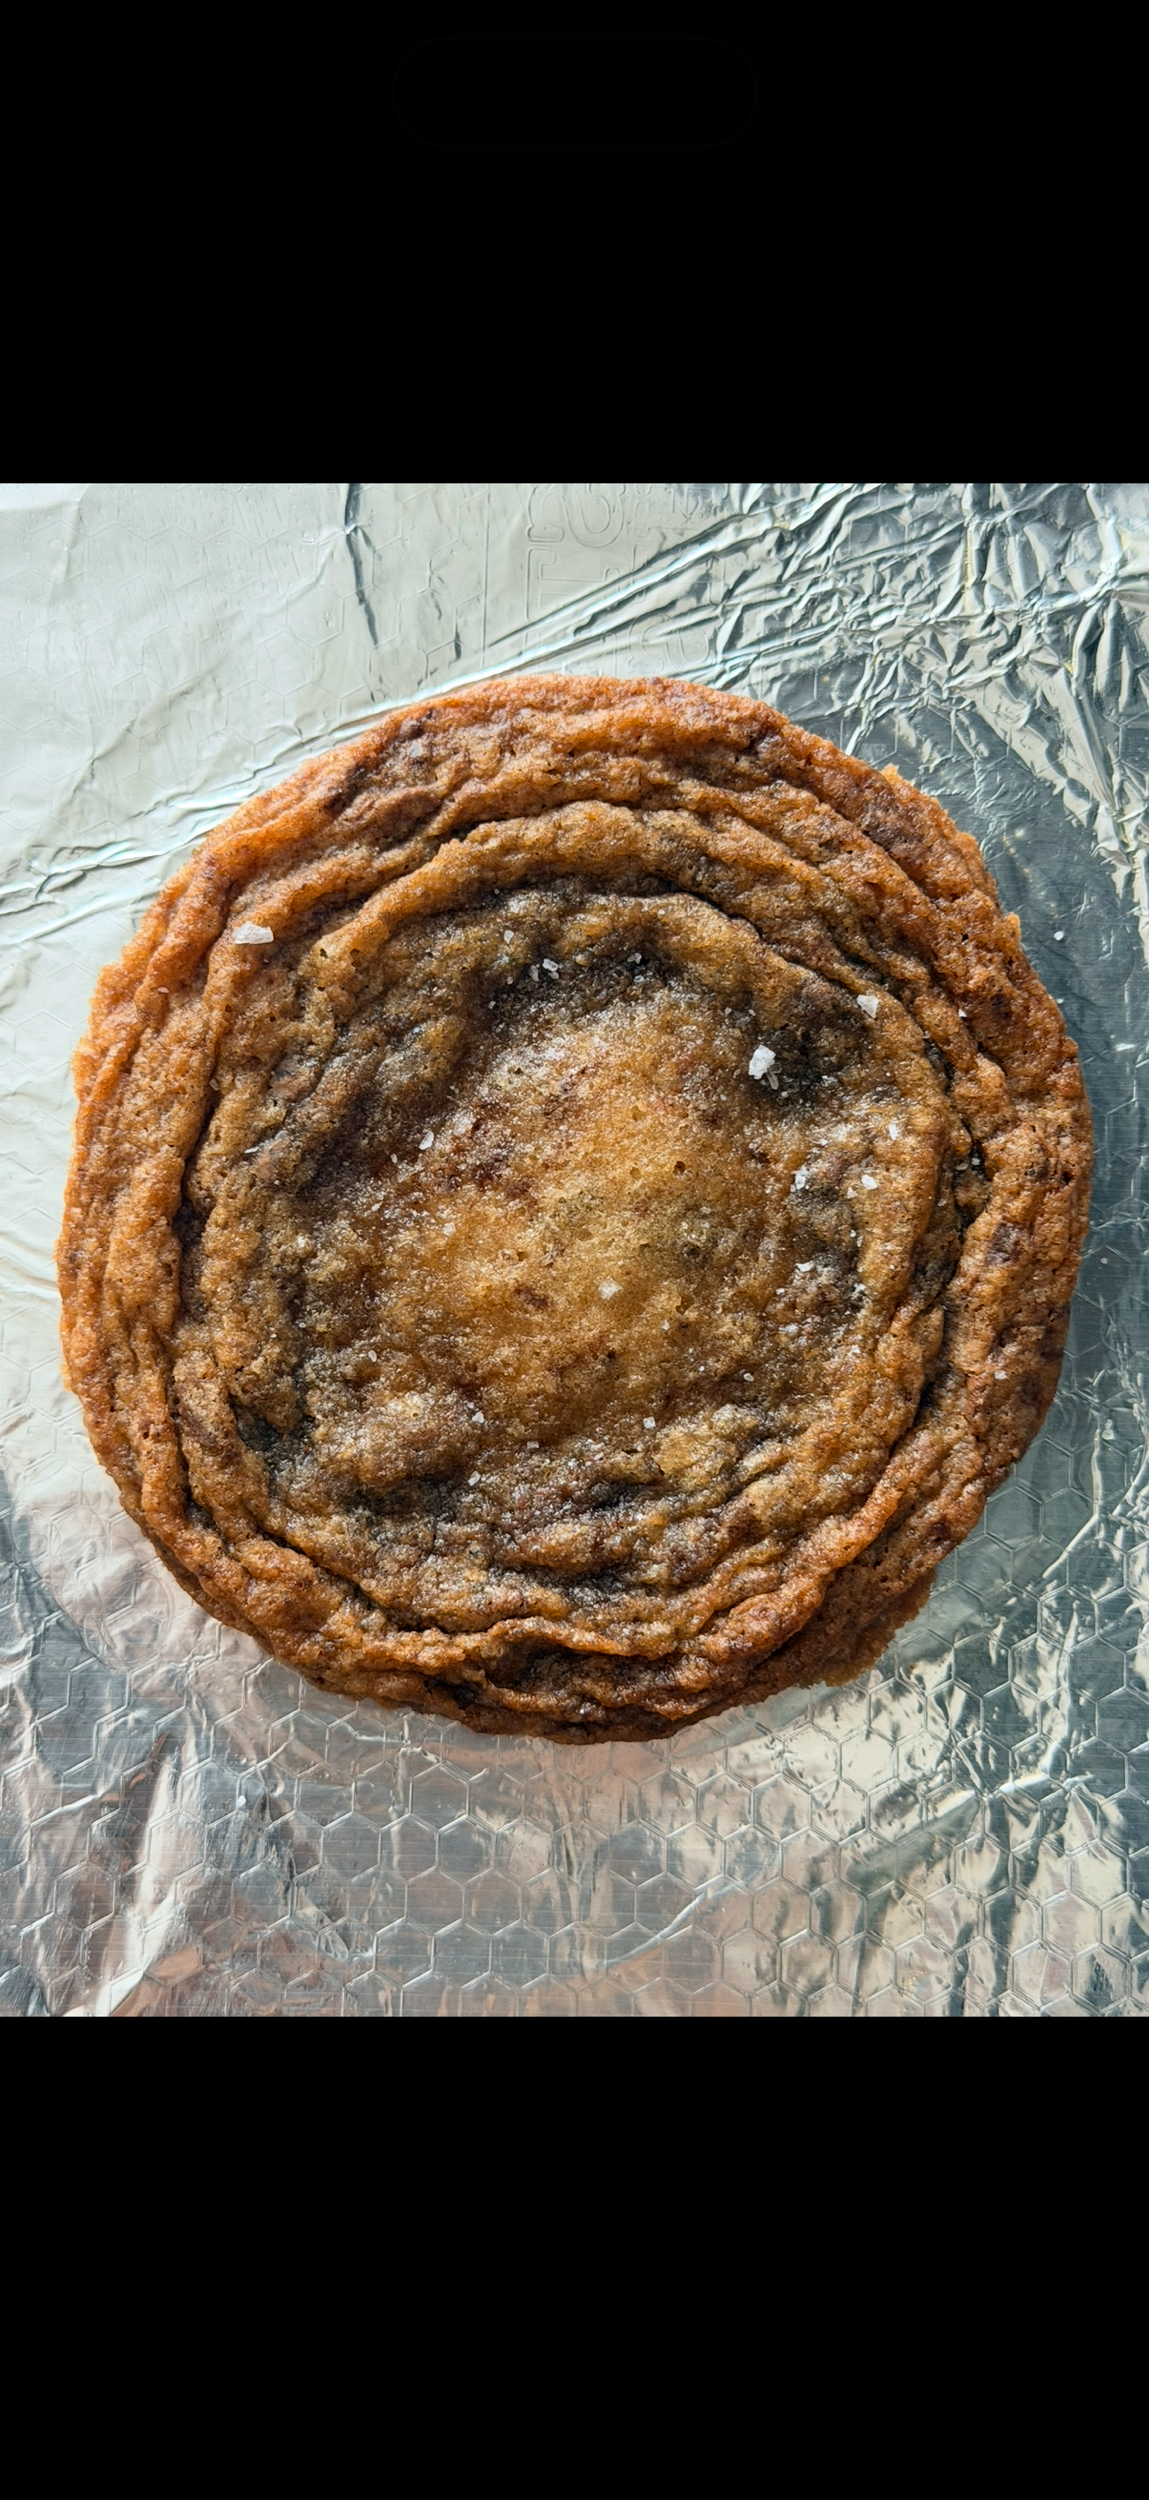
Golden, crisp, rippled edges. A soft, chewy middle. Toasted brown butter, a little malt, pools of milk and dark chocolate, and a generous sprinkle of flaky sea salt. Its taken a bazillion years and aged me but I am pretty proud of this one!
This is my idea of the (almost!) perfect cookie: thin but not too thin, crunchy AND soft, beautifully rippled, and absolutely no pan banging or fancy equipment required.
Developed through weeks of testing, failed batches and a fridge full of graveyard dough, this recipe brings together everything I loved about the rippled cookies I tried, with a few additions of my own.
The download includes:
The full recipe in grams, with baker’s percentages.
Clear, beginner-friendly instructions and step-by-step photos.
The ingredient brands and equipment I used.
Baking, cooling and storage guidance.
Notes and troubleshooting to help you along the way.
Makes approximately 9 large cookies, using 90 g portions. The malted mik powder is optional, and you can use regular softened unsalted butter if you prefer.
This recipe has only been tested in my own kitchen. I’ve included as much detail as possible, but ingredients, equipment and ovens vary, so your results may too.
Please be my recipe testers! If you make them, share your cookies, tag me on socials and tell me how you got on. I’d love to see them in kitchens other than mine.
Download the free recipe and enjoy my angels!
This is a digital recipe download, rather than a box of cookies. Le sigh.